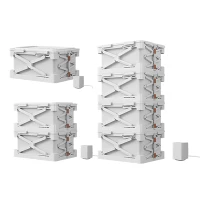

1. Determine the installation location according to the drawings.
2. Check the hardware against the list, check whether the number of packages of the cabinet is consistent with the number of packages in the package details, and then check whether the glass, sliding door are cracked, and whether the door panel is scratched. If there is any abnormality, report it immediately.
3. Unpacking: first unpack all the side panels, top and bottom panels, and solid layers, check whether the panels are scratched, spread the wrapping paper on the ground to prevent scratches on the panels, and then apply glue particles , Connect the screws, put wooden plugs and flat cakes on the top and bottom plates, and gently place them against the wall in order. All excess wrapping paper is folded and placed in a proper place.
4. If there are upper and lower cabinets, first install the lower cabinet and then install the upper cabinet. When the space is available, use the horizontal installation. If the space is not large enough, use the vertical installation.
5. Install the upper cabinet: If the cabinet is against the wall on both sides and there are plaster lines, you can leave 40mm in front of the two panels at this time, saw the excess part of the top cabinet below the plaster line, and then plan the sides to match the plaster line. .
6. For the installation of the side panel to the top, first place the high side panel at a distance of 600mm and push it in parallel to the installation position to judge whether the height is appropriate. A gap of 3-5mm should be reserved between the high side panel and the ceiling.
7. Installation example of standard 2+4+3 combination:
①. Lay the high side panel of the cabinet flat on the ground, first fill in the rubber particles and fix the three-in-one connecting rod.
②. Set the connecting rod and pie on the laminate.
③. The solid layer is assembled, the three-in-one big cake of the foot line is facing down, the solid layer cake at 2100mm is facing up, and the holes of the other big cakes are facing down.
④, nail the back plate.
⑤. The installation of No. 3 cabinet is the same as that of No. 2 cabinet.
⑥. Stand up the No. 2 and No. 3 cabinets and approach them inward, so that the top and bottom plates of the No. 4 cabinet are aligned with the three-in-one holes of the No. 2 and No. 3 cabinets, and tighten the pie. Into 20mm fixed with a foot size.
⑦, nail the back plate.
⑧. Push the installed cabinet to the position to be installed.
⑨, according to the situation on site to make a good closing.
8. Installation in the cabinet:
①. The active layer is mainly divided into equal parts, and the space can also be selected arbitrarily. After installing the layer board particles, put the active layer.
②. If there are multiple drawers in the cabinet, it can be installed from the bottom, and finally fix the solid layer with a corner code, and the distance between each drawer is 2mm.
③ If there are drawers, trousers racks and lattice racks in the cabinet, install the drawers first, then the lattice racks, and finally the trousers racks. The distance between the three accessories is 20mm.
④. The L frame can be installed after the back plate is nailed, and fixed on the back plate with the corner code at the inner and upper part of the L frame.